Inspired by Robyn at My Pink Stamper, I made this little Google search video, just for fun. It gives you a very quick idea of some of the things I love - besides Cricut, of course!
It's super quick and easy to make one, so give it a try!
Tuesday, April 27, 2010

Sunday, April 25, 2010
"When Your Day Sucks" Bouquet

I saw a version of this bouquet quite a while ago made for a 40th birthday, and it said "40 sucks" and had 40 suckers in it. It could also be used for a hospital gift when a patient isn't allowed to have real flowers and say something like, "Being sick SUCKS. Hope you LICK it soon!" Whatever you use it for, the recipient is sure to feel loved.

Supplies:
• plastic flower pot
• glass florist marbles
• 1 large green silk hydrangea stem
• spanish moss
• wired florist picks
• Dumb Dumb suckers
• 1/2 florists foam ball to fit pot
• florists tape
• ribbon, card stock
• wire cutters
• hot glue gun and high heat glue sticks
Using hot glue, adhere ribbon to outside of pot.
Fill the bottom of the pot about half to 2/3 full to keep arrangement from being top-heavy when filled with flowers.
Using hot glue gun, generously put a bead of glue all around the inside top edge of pot and place foam ball so it fits just inside. Use a craft knife to trim the edge of the ball if necessary to make it fit.
Using hot glue and doing a small section at a time, adhere moss to completely cover ball.

Using wire cutters, cut hydrangea into smaller stems or bunches. Attach each bunch to florist's pick by wrapping the wire around the stem, then using the florist's tape to cover the stem and about 1/2 of the pick. Push picks into foam, spacing evenly around arrangment.
 .
.Cut flowers from assorted colors of cardstock. I used a flower from "Walk in My Garden" and cut at about 4". Using a craft knife, cut an "x" in the center of each flower.

Attach a pick to each Dumb Dumb as you did with the hydrangea stems by wrapping the wire around the pick and sucker stick. Insert a sucker pick through the center of each flower and finish by wrapping pick and stick with florist's tape, making sure to press sucker flat against flower and start tape tightly against the bottom and catching flaps that were made by the "x".


Add completed flowers to pot, filling in spaces between hydrangea picks. Print sign, sandwich pick between front of sign and a back piece, add ribbon, and add to the arrangement.

Wednesday, April 21, 2010
And the WINNERS are....

The winner for tonight's drawing in celebration of my blog having 50,000 hits and the Blog Candy shown above is.....Staci from New Jersey! (her blog is Precious Memories Scrapbooking and More) Congratulations Staci! E-mail me your addy so I can send your goodies to you!

And the winner of the drawing when I hit 700 followers the other night was Nicole of Croppin Momma Designs! Congratulations Nicole! Your goodies are on their way!

Candy Bar Purse is back just in time for Mom!
 I just love seeing what you all do with my designs, and these 3 Candy Bar Purses from Staci at Precious Memories Scrapbooking and More are no exception. I absolutely adore the way she embellished them with the swirlies and flowers, and her color and paper choices are so cheerful! Stop by her blog and take a look at her other creations.
I thought this might be a good time to repost these with Mother's Day right around the corner. I know my mom would love one containing a Ghirardelli chocolate bar and a gift card tucked in the pocket. If you want to make your own Candy Bar Purses and missed the files the first time around, click here to go to my original post with links to the files for either Gypsy or Design Studio. You'll also need the George cartridge,12x12 cardstock, and a velcro dot set for the closure. Have fun with it!


Cricut Kisses and Crafty Wishes!
Tuesday, April 20, 2010
Make Room For More Rubber and Ribbon!
I am one lucky lady who has a big room dedicated to my crafting, but with so much room to spread out, I neglected to realize the importance of organizing all my stuff from the beginning. Once it began to get out of control, something HAD to be done! So, recently, I started an honest attempt at getting my scraproom in order. After all, if I'm going to continue to invite all of you in for tutorials, I must clean it up. My mom would be horrified at me having company when it's such a mess!
About 6 months ago, I started collecting the Jetmax craft storage cubes. That was a good start, but I soon realized that they weren't going to solve all my problems. The three biggest things that needed wrangling were my ever-growing collections of ribbon, rubber stamps, and card stock. Jetmax makes a couple of units that are perfect for the card stock, but I couldn't find a suitable home for my rubber and ribbon in Jetmax. In fact, I've been looking for more than 4 years for the "perfect" ribbon storage solution, and my stamps had simply outgrown the space I had available for them. Something had to change.
I'm so pleased with the 2 solutions I've found for my ribbon and rubber that I want to share them with you, but I've decided to do a whole series of how I've solved some of my craft room issues, starting with this one about converting your rubber stamps from wood mounted to unmounted. Thanks to the awesome new storage cases from Stampin' Up! I've started umounting all of my stamps and reducing their storage to about 1/4 of the space they took before. This is possibly the BIGGEST space saving change I could have made, and I can't recommend it enough! It's also allowed me to store similar stamp sets together so I can plan my projects more efficiently.
UPDATE: Thank you Jamie for sharing your idea for using the old wood blocks! Visit Jamie's blog to see what she did. I'm totally going to be scraplifting this one!
Below is the link for the video tutorial, along with information on how to order the cases and acrylic blocks. Take a look and start wrangling that rubber! And stay tuned for my ribbon storage solution!
Clear-Mount Stamp Storage Cases, (set of 4) $4.95 Item #119105
Acrylic Blocks
118487 Block A (1-3/16" x 1-1/4") $3.95
117147 Block B (1-5/8" x 1-15/16") $5.95
118486 Block C (2" x 2-1/4") $6.95
118485 Block D (2-7/8" x 2-11/16") $8.50
118484 Block E (3-7/16" x 4-7/16") $11.95
118483 Block F (4-7/8" x 6") $16.95
118489 Block G (3/4" x 2-1/2") $4.50
118490 Block H (1-5/8" x 4-7/16") $8.50
118488 Block I (2-1/4" x 5-7/8") $11.95
118491 Block Bundle (Blocks A-I) $69.95
 Click the Stampin' Up! logo to go to my site where you can order these products and wrangle YOUR rubber!
click here to view larger on my tutorials page
About 6 months ago, I started collecting the Jetmax craft storage cubes. That was a good start, but I soon realized that they weren't going to solve all my problems. The three biggest things that needed wrangling were my ever-growing collections of ribbon, rubber stamps, and card stock. Jetmax makes a couple of units that are perfect for the card stock, but I couldn't find a suitable home for my rubber and ribbon in Jetmax. In fact, I've been looking for more than 4 years for the "perfect" ribbon storage solution, and my stamps had simply outgrown the space I had available for them. Something had to change.
I'm so pleased with the 2 solutions I've found for my ribbon and rubber that I want to share them with you, but I've decided to do a whole series of how I've solved some of my craft room issues, starting with this one about converting your rubber stamps from wood mounted to unmounted. Thanks to the awesome new storage cases from Stampin' Up! I've started umounting all of my stamps and reducing their storage to about 1/4 of the space they took before. This is possibly the BIGGEST space saving change I could have made, and I can't recommend it enough! It's also allowed me to store similar stamp sets together so I can plan my projects more efficiently.
UPDATE: Thank you Jamie for sharing your idea for using the old wood blocks! Visit Jamie's blog to see what she did. I'm totally going to be scraplifting this one!
Below is the link for the video tutorial, along with information on how to order the cases and acrylic blocks. Take a look and start wrangling that rubber! And stay tuned for my ribbon storage solution!
Clear-Mount Stamp Storage Cases, (set of 4) $4.95 Item #119105
Acrylic Blocks
118487 Block A (1-3/16" x 1-1/4") $3.95
117147 Block B (1-5/8" x 1-15/16") $5.95
118486 Block C (2" x 2-1/4") $6.95
118485 Block D (2-7/8" x 2-11/16") $8.50
118484 Block E (3-7/16" x 4-7/16") $11.95
118483 Block F (4-7/8" x 6") $16.95
118489 Block G (3/4" x 2-1/2") $4.50
118490 Block H (1-5/8" x 4-7/16") $8.50
118488 Block I (2-1/4" x 5-7/8") $11.95
118491 Block Bundle (Blocks A-I) $69.95
click here to view larger on my tutorials page
Sunday, April 18, 2010
CELEBRATION - Blog Candy!
It's not too late to enter!
|
| Click the image to see it larger |
WOW! I can't believe I've hit 50,000 visits already! I can't thank all of you enough for making me feel every day that my blog is worthwhile. I love sharing with all of you, and I love being a part of the online crafting community. I have made some wonderful friends because of this blog, and I hope to make many, many more.
In celebration of my 50,000 visits, in the year that I turned 50 - two big milestones - I have some BLOG CANDY to give away! Last week I promised you all a peek at my haul from Tuesday Morning. Well, I decided not to show you and save it as a surprise giveaway instead, so here is part of it - the part I'm giving away! All you have to do to win is be or become a follower AND leave a comment under this post. On Wednesday, April 21 at 11:00 PM, I'll choose a winner from the comments and post the winner here.
But wait, there's more!! I'm currently at 683 followers. If I reach 700 by midnight tonight, I'll also give away a pink Target pencil case for storing Gypsy, a 3-pack of styluses (is that the plural of stylus?) that includes one of the new bendable ones to "attach" to your finger for those marathon Gypsy design sessions, AND a surprise package of miscellaneous scrapping and cardmaking supplies.
That's TWO chances to win a prize - one at midnight tonight and one on Wednesday! All you need to do is comment, then spread the word so I can get 17 more followers by midnight tonight! Easy Peasy!
PS - Don't forget to leave me a way to contact you! If your user ID doesn't connect me to your email, please leave it in your comment so I can let you know the minute you win! Good luck!
Had 703 followers by 9:27 PM Sunday! Thank you all!
THE WINNER OF THE MIDNIGHT DRAWING IS....
Nicole of Croppin Momma Designs! Congratulations Nicole! E-mail your address and I'll get your prize to you ASAP!
Cricut Kisses and Crafty Wishes!
Friday, April 16, 2010
In Remembrance...

Immediately, I turned on the small television that I've kept in my office at work since September 11, 2001. I couldn't believe what I was seeing. There was live footage from the campus, and you could clearly hear gunfire. My mind flashed back to my four years there as a student. I had always loved how peaceful it was on our campus in the little southwest town of Blacksburg, Virginia. We were a large school - population nearly 25,000 then, but the little town of Blacksburg had only a population of around 8,000. The student population in 2007 was over 40,000, but the town is still small. It was unfathomable to me that this was happening there.
Right away, I got on the phone to call my husband and my sister and her husband. All four of us are VT grads. Over the next few hours, we tried to get in touch with people that we knew had kids there. Eventually, my daughter heard from Meg - thank God for Facebook! As you can imagine, phone lines in and out of Blacksburg were all busy, so many parents tried frantically for hours to reach their children. Ultimately, it was Facebook that most of the kids used to communicate with each other and with their families. Later that afternoon, I got another text message from my daughter; "They say 32 dead." It was a haunting message that I looked at many times over the next weeks, still not believing it had happened.
When word began to come out about the victims, we were shaken to find out that an old friend that we adored had lost his beautiful daughter, and a co-worker of my husband's had lost a nephew. I felt helpless. I wanted to help in some way, but there was really nothing I could do but offer words of love and support. Then I got an idea: I would appeal to all of my stamping friends to send cards to the families. I posted on Splitcoast Stampers and asked for cards to be sent directly to me, which I then forwarded to our friends. The response moved me to tears. Cards flooded in for weeks. The one pictured here is the one that I made.
On this day, three years later, I am aching to be on the Virginia Tech campus for the memorial services. My sister and her son - now a sophomore there - are running in a 16-mile marathon today in rememberance of the 16th of April, 2007. Please say a prayer for them, and for the families of the vicitims. Three short years later, it will be a difficult day for them.
Thursday, April 15, 2010
Put a smile on your mail carrier's face - VINYL PROJECT!

Here's a quick project that you can do with leftover scraps of vinyl, though it turned out so cute that you just might want to go in search of some specifically for this use. All images are from the Walk In My Garden cartridge, and I used pieces from my vinyl scraps for most of the images. I'm lucky enough to use a Cricut Expression and outdoor vinyl at work, and I bring home all the scraps from those projects.
Provocraft makes adhesive vinyl in many colors, and in my area, Joann's carries the largest selection. Michael's carries limited colors as well. If you haven't used vinyl before, you'll also need to purchase transfer tape or contact paper for application. I personally use contact paper because it's so much cheaper. It's very sticky off the roll though, so place it on your clothing and rub and remove 3-4 times before using to de-stickify it just a bit.
 If you've never used vinyl in your Cricut projects and need a tutorial, here's a really good one from Above Rubies Studio. She used blue tape to transfer, but I prefer the contact paper so I can see through it and get it aligned just right. Take a peek at it, then spruce up your mailbox for spring!
UPDATE: GREAT idea from CherB at Cheryl's Window - use removable vinyl so you can easily remove it and change for the seasons and holidays!
Cricut Kisses and Crafty Wishes!
Wednesday, April 14, 2010
Stampin' Up! Reveals New Color Palette
Order Your Favorites Before They're Gone!
 |
Click the chart above to view or print a larger version, with retiring colors page |
Stampin' Up! has kept up with the changes in color fads for the past several years through its "In Color" Collections, which were changed each year to complement the standard 48-color palette, plus a neutrals collection. This year, they're streamlining the system and presenting a palette that contains only 40 colors. Love it or hate it, it's definitely updated to reflect the changes in color trends and customer use. Stampin' Up! will continue to release 5 new In Colors each year, and they will have a lifespan of 2 years. That means that there will always be 50 colors to choose from, with 5 new colors per year.
The new color line-up will become effective with the July 2010 catalog, so retiring colors will only be available until the end of June. If one of your favorites is retiring, I suggest you order well in advance of that, as I suspect that as June nears and they run out of a retiring color, they won't restock. You can order from me online by clicking here or on the Stampin' Up! logo that is always on this page at the right - part way down the page. (I'm not a hardcore seller, but every little bit you buy from me helps keep me in craft supplies so I can keep this blog going!) Remember to also order stamp pad reinkers and extra markers if it's a color you really love!
Here's a complete rundown of what's staying, what's going, and what's making its debut!
Carryover Colors
Old Olive
Pumpkin Pie
Real Red
Regal Rose
Tempting Turquoise
Always Artichoke
Brave Burgandy
Elegant Eggplant
Garden Green
More Mustard
Night of Navy
Not Quite Navy
Bashful Blue
Certainly Celery
Perfect Plum
Pretty In Pink
Rose Red
So Saffron
Basic Black
Basic Gray
Chocolate Chip
Crumb Cake (formerly "Kraft")
Sahara Sand
Very Vanilla
Whisper White
Returning "In Colors"
Melon Mambo
Pacific Point
Tangerine Tanerine
River Rock
Soft Suede
Red Riding Hood
Rich Razzleberry
Wild Wasabi
Pink Pirouette
Baja Breeze
New Colors
Daffodil Delight
Cajun Craze
Early Espresso
Cherry Cobbler
Marina Mist
Retiring Colors
Pink Passion
Pixie Pink
Pale Plum
Orchid Opulence
Lovely Lilac
Lavender Lace
Almost Amethyst
Bordering Bleu
Brocade Blue
Ballet Blue
Brilliant Blue
Taken With Teal
Glorious Green
Handsome Hunter
Sage Shadow
Mellow Moss
Green Galore
Gable Green
Barely Banana
Yoyo Yellow
Summer Sun
Apricol Appeal
Only Orange
Really Rust
Ruby Red
Cameo Coral
Blush Blossom
Creamy Caramel
Close To Cocoa
Going Gray
Don't delay - order your extra card stock, inkpad refills and markers in your favorite retitring colors before they're all gone! Just click here to go to my Stampin' Up! page to place a secure online order!
Make it a COLORFUL day!
Cricut Kisses and Crafty Wishes!
Monday, April 12, 2010
New Jetmax Pieces at Michael's with PHOTOS!
These might not be new to some of you, but they are totally new to the Michael's stores in my city, and trust me, I've been to ALL of them! The best part is, they are all 50% off at Michael's this week, so if you've been working on your craft room, this is a great time to pick up some more! Please forgive the quality of the photos. I took them with my Blackberry from the boxes when I was there today during my lunch hour.
 I bought 2 of these units. They are $79.99 normally, so I got them for only $40 today. I think the "drawers" are heavy-duty coated cardboard, so they aren't going to hold heavy books, paints, etc., but what I loved about them is that they have lids on each one, and they fold almost flat, so if you wanted to use one section as a shelf, you could easily fold up the box for storage. I plan to use mine for yarn and my spare rolls of ribbon where they'll be safe from dust. And yes, I have that much yarn and ribbon!
 The glass door cube is my new favorite! I can picture them decorated in all sorts of ways with cute adornments cut in vinyl on the Cricut. The unit has one shelf inside and is $34.99.
 Finally, a file drawer unit for your 12x12 card stock! The drawer has rails and comes with 4 hanging file folders. I'm hoping they will come out with packages of additional folders soon! $34.99
 The workstation cube comes with 4 canvas drawers and a drop-down door that is held closed by a strong magnet. I got to see this one assembled, and I have to admit that I like it better than I thought I would. The drawers are fairly small, so the fact that they're canvas isn't a sturdiness issue as long as you don't overload them. They would be nice for small jars of glitter or embossing powder. I believe this one was also $34.99.
Additional new pieces that aren't pictured:
Divider set to fit either the 3-drawer cube or the one-drawer cube with shelf. 6 dividers to make 12 sections, $9.99
Mini drawers, fit the top 4 sections of the Embellishment Center. Package of 2, $9.99
Paint Bottle Tray, heavy plastic with 36 wells for storing paint bottles (such as Apple Barrel acrylics) upside down, fits in the full size drawers, $3.99
Peg Boards, hang on the side of any cube, $19.99 (additional pegs sold in packs of 4)
Wall-Mount Magnetic Embellishment Board with 4 Storage Tins, can't remember price, sorry!
Saturday, April 10, 2010
Announcing 16 Members of the
Royal Crafting Court!
 |
| Click the image to enter the Blogdom |
As one of my first coronation subjects, SassyLady, put it, this award is for "worthy ladies and gentlemen that share the desire to pass their crafting love and skills to all the subjects in the kingdom without royal fees or taxes." As they spread their wealth throughout the land, these clever subjects deserve to be treated as royalty, with those of use who use their ideas bowing at their feet (or at least visiting their blogdoms and leaving a comment).
The Royal Coronation was kicked off by me crowning six deserving ladies and asking them to go forth throughout the Blogdom and crown other worthy subjects. The Court is pleased to present to you the first 16 members of the Royal Court. Though they have not demanded that you pay taxes when visiting their Blogdoms, they do adore comments and will work hard to keep all of their royal subjects happy so long as they feel appreciated. And when you visit my sister Queens, please be sure to tell them that Queen Cindy sent you!
If you know of a Crafting Princess who deserve to wear the crown of the Crafting Queens, please email me and I will invite them to the next coronation!
Cricut Kisses and Crafty Wishes!
Thursday, April 8, 2010
ENABLER ALERT!!
Songbird Card Stock Stack
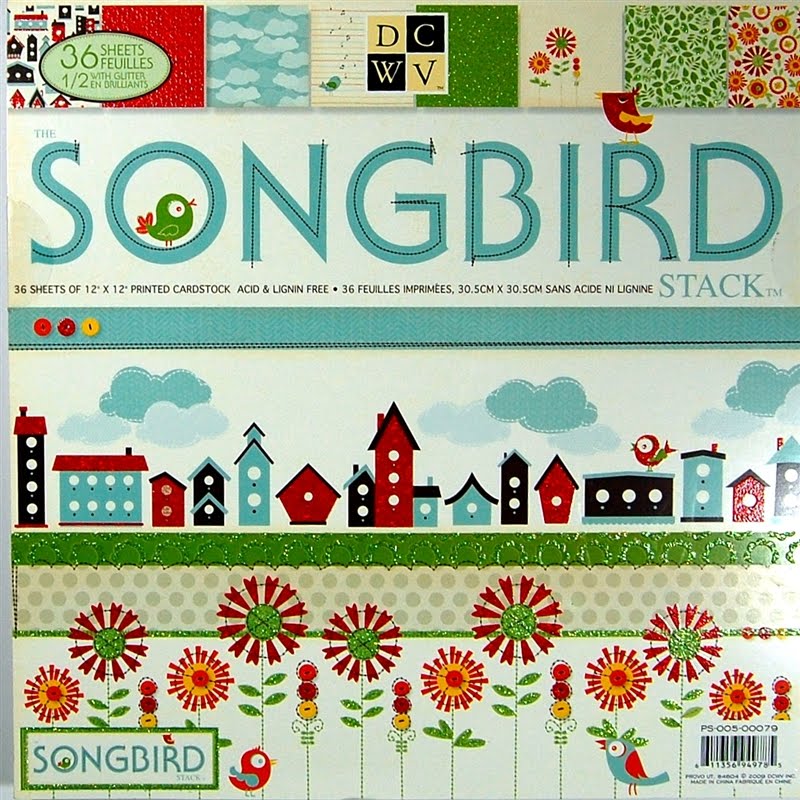
The stack includes 36 sheets, each cuter than the next. I found it at Michael's, and I'm sure Joann's will carry it, too. Be sure to check it out on your next craft shopping trip!
Sunday, April 4, 2010
Get rid of those blemishes and under-eye circles!!

If you have Photoshop Elements in any version since 3, you can use this simple and quick technique. I have even provided you with a photo to download so you can practice along with me. Just click the link below to download the photo, open it in Photoshop Elements, and follow along with my video. Pretty soon, you'll be making all your friends and relatives look even more gorgeous than ever!!
Download the photo from the tutorial so you can follow along with me.
Click here to go to YouTube to watch in a larger window
Friday, April 2, 2010
Hear Ye! Hear Ye!
Presenting a new award!

I've been lucky enough to be honored several times by other bloggers' awards, and I wanted to pay it forward and create an award of my own - with a bit of a twist. So...
Hear Ye! Hear Ye! A Royal Proclamation!
On this date, Friday the 2nd of April in the year 2010, I hereby create this award for all Crafting Queens or Kings! To be crowned, a blogger or web site owner must share files, templates or tutorials free of charge, and must do so equally for all of the loyal subjects in Blogdom (ie. no "members only" or paid membership blogs, please). Blogs who sell things are OK, too, as long as they offer something crafty and free on a fairly regular basis. To crown someone, leave them a comment or send an email directing them to your blog to pick up their crown.
Receivers of the award must pay it forward to at least one other crafty web site or blog, and should link back to the site that crowned them. If you've been crowned, please send an email to me at Cre8tveLdy@aol.com, along with your web or blog address and the website of whoever crowned you, so I can list you as a Royal Blogger. (If you need the "King" version of the award, let me know and I'll email it to you.)
I hope you will proudly display this award on your site, and I thank you for being such a benevolent Queen or King who is so generous to your loyal subjects!
And now for the first crowning ceremony, I would like to send you to the following Blogdoms:
Audrey - Cute and Some
Cheryl - Cheryl's Window
Crystal - Design Create Inspire
Elizabeth - 217Creations
Pam - TheBugBytes
Sheila - She's A Sassy Lady
Be sure to be a good royal subject and leave them a comment when you visit, so they know how much you appreciate them!
Cricut Kisses and Crafty Wishes!
Gypsy Quick Tips

Here are 4 good ones to know:
1) On the keyboard overlay screen, hold down the upper left silver button and click on any key to see it full screen size. Release the button and tap again to close it. This is an awesome one because you can see the image in detail!
 2) When you're on a screen that has a list you can scroll through vertically, the left silver buttons scroll through the list one item at a time.
3) On the work mat, if you zoom in as far as the Gypsy will let you, you are looking at your image (or the part of the image that you can see) at the actual size it will cut.
4) When using the search function, searches are case sensitve. All keywords are lower case, so for best results, don't use capital letters when performing a search.
Cricut Kisses and Crafty Wishes!
Thursday, April 1, 2010
Popcorn Box - Updated files and supply option

I wanted to update you on two things about the popcorn box. As I explained in my post yesterday, I have reposted the files so that there are actually 4 versions - 1) Gypsy using Plantin and TBBM, 2) Gypsy using George and TBBM, 3) Design Studio using Plantin and TBBM, and 4) Design Studio using George and TBBM. I redid them after realizing that many of you probably had either Plantin or George, but not both. If you downloaded the first version, you might want to go back and download it again. If you have the most recent version, it will say "UPDATED" in the zip file name. Once you unzip it, you will see that there is a version for George and one for Plantin. You simply use the one for whatever cartridge you have, and you can delete the other. I hope now that many more of you will be able to use the file now!
Second, last night I was looking at the service that tracks the hits on my blog. It tells me where people come from to get to my blog - like a link from another blog - and I often find ones from google. I love those because I can see specifically what people have searched for to find me. Anyway, this one had searched for "popcorn card," and there was another entry that I clicked on where the lady had done an adorable little card from a retired Stampin' Up! stamp (that I have never seen and REALLY want now!). She was using Liquid Applique instead of the Tulip Puffy Paint. It basically worked exactly the same and gave the same effect, so if you have some LA in your stash, you don't have to run out for Puffy Paint - unless you NEED an excuse to go shopping!! I'm always willng to be your enabler, and I won't tell your hubby...wink, wink.
Have a wonderful Easter weekend. Cricut Kisses and Crafty Wishes!
Subscribe to:
Posts (Atom)
About Me

- Cindy McVey
- Midlothian, Virginia, United States
- Lifetime crafter, beginning with sewing clothes for my troll dolls when I was 5. Stampin' Up! demonstrator since 2000. Wife of almost 30 years to my high school sweetheart and planning on 30 more! Mom to 2 great kids and one awesome new son-in-law. "Mom" to 3 furkids, Pomeranians Roxy and Lulu, and a Calico cat, Sugar aka "Miss Fattypants." Addicted to all things Disney!